> ## Documentation Index
> Fetch the complete documentation index at: https://docs.supadata.ai/llms.txt
> Use this file to discover all available pages before exploring further.
# Supadata MCP Server — YouTube Transcripts & Web Scraping for AI Agents
> Connect Claude, Cursor, and ChatGPT to YouTube transcripts and web scraping via the Supadata MCP server. Get video transcripts, scrape websites, and crawl pages directly in your AI assistant.
## Overview
The Supadata MCP (Model Context Protocol) server enables powerful web and video scraping capabilities directly within AI assistants and development environments like Claude, Cursor, and VS Code. This open-source integration allows AI models to extract transcripts, scrape web pages, and crawl entire websites to gather context.
Supadata is listed in the Claude connectors directory. In Claude, open [Customize → Connectors](https://claude.ai/customize/connectors), search for **Supadata** and click **Connect** — full steps are under Integration Setup below.
## Features
* **Multi-Platform Support**: Works with YouTube, TikTok, Instagram, Twitter, Facebook, and more
* **AI-First Design**: Optimized for use with LLMs and AI assistants
* **Multiple Tools**: Transcript extraction, web scraping, site mapping, and crawling
* **Easy Integration**: Simple setup with popular AI tools
## Available tools
| Tool | Description |
| - | - |
| `supadata_transcript` | Get a transcript from a video URL (YouTube, TikTok, Instagram, X, Facebook) or file URL |
| `supadata_check_transcript_status` | Poll an asynchronous transcript job by its job ID |
| `supadata_metadata` | Get metadata (title, author, engagement stats) for a social media post or video |
| `supadata_extract` | Start an AI structured-data extraction job for a video |
| `supadata_check_extract_status` | Poll an extraction job by its job ID and get the extracted data |
| `supadata_scrape` | Scrape a web page and return its content as Markdown |
| `supadata_map` | Map a website and return the list of URLs found |
| `supadata_crawl` | Start a crawl job for a website |
| `supadata_check_crawl_status` | Poll a crawl job by its job ID and get the crawled pages |
Tools use your regular Supadata credits at the same prices as the API. A native transcript costs 1 credit, but an AI-generated transcript costs 2 credits per minute of video — a single 50-minute video uses the free plan's 100 monthly credits. Checking job status is free. See [transcript pricing](/get-transcript#pricing).
## Hosted server vs. local server
There are two ways to connect:
* **Hosted server** at `https://api.supadata.ai/mcp` — uses OAuth. You sign in with your Supadata account when the client prompts you; no API key is needed. Use this with Claude (from the connectors directory), Claude Code and ChatGPT.
* **Local server** via `npx -y @supadata/mcp` — runs on your machine and authenticates with your API key passed as the `SUPADATA_API_KEY` environment variable. Use this with Cursor, Windsurf, VS Code and other stdio-based clients.
## Installation
### Manual Installation
```bash theme={null}
env SUPADATA_API_KEY=your-api-key npx -y @supadata/mcp
```
## Integration Setup
### Claude / Claude Desktop / Cowork
Supadata is listed in the Claude connectors directory, so you can connect without a URL or an API key. The same connection works in Claude on the web, Claude Desktop, Claude mobile and Cowork.
1. Open [**Customize** → **Connectors**](https://claude.ai/customize/connectors) in Claude
2. Search for **Supadata** and click **Connect**
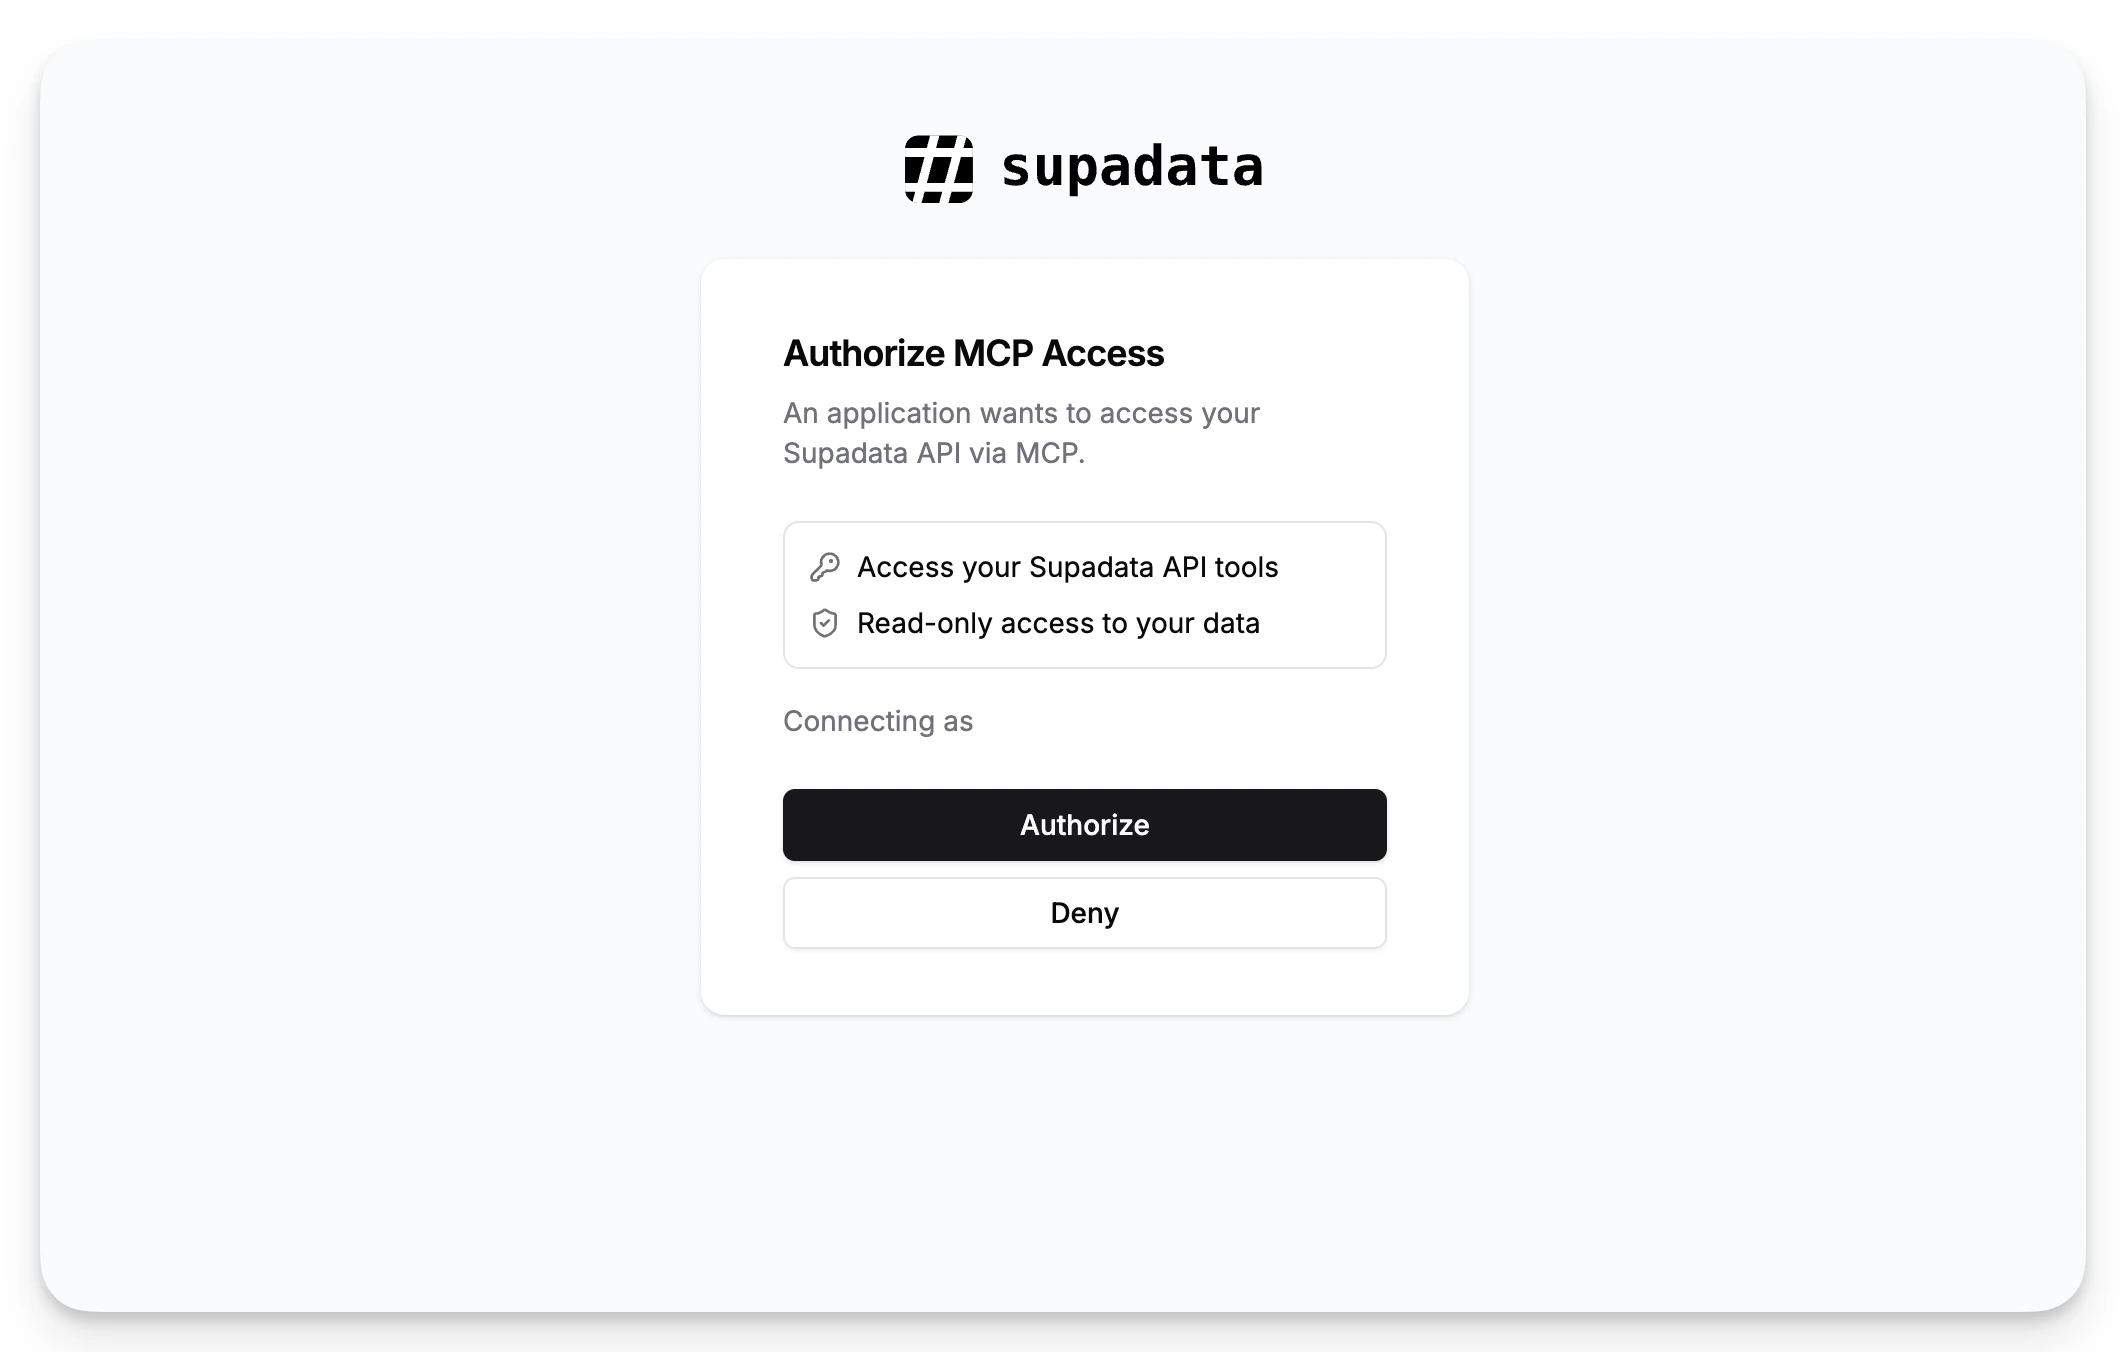
3. Sign in with your Supadata account and click **Authorize** to grant MCP access
 On **Team and Enterprise** plans, an Owner first enables Supadata for the organization under [**Organization settings** → **Connectors**](https://claude.ai/admin-settings/connectors). Members then connect with their own Supadata account. On Team plans, members without permission see a **Request** button that notifies the Owners.
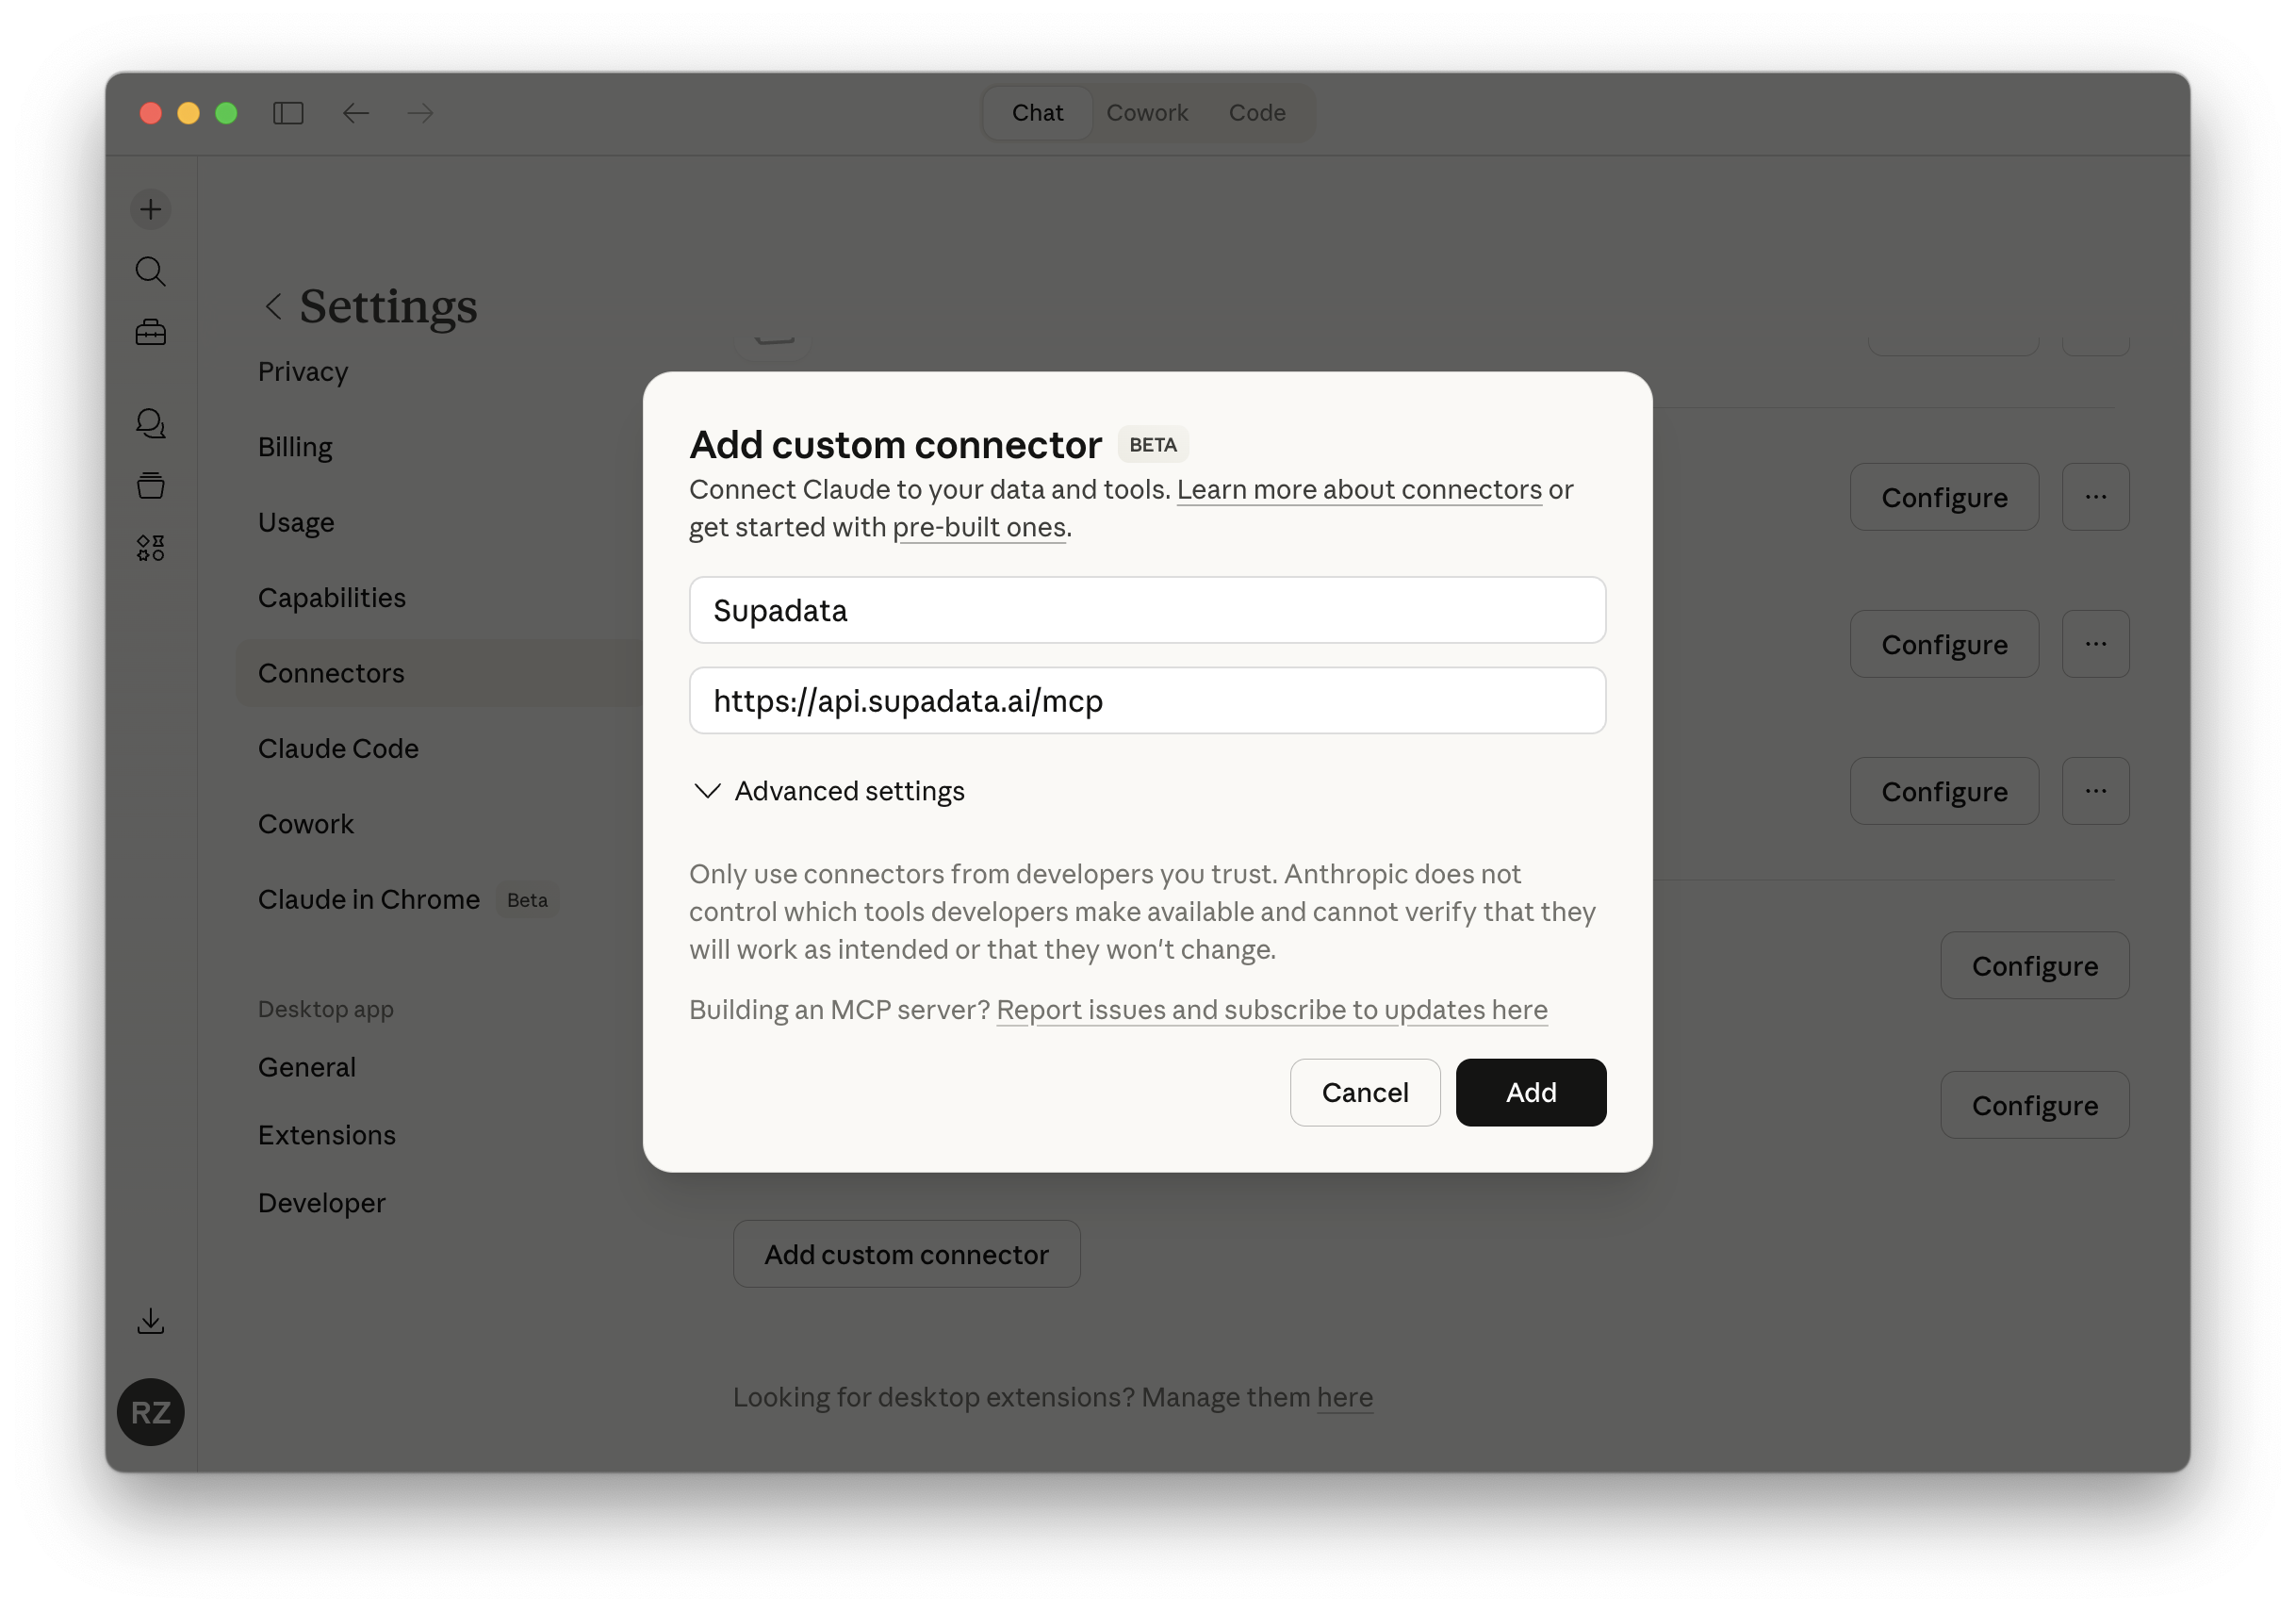
If you added Supadata earlier with **Add custom connector** and the URL `https://api.supadata.ai/mcp`, that connection keeps working and shows under **Custom** in Claude's connector settings. To switch to the directory listing, remove the custom connector and connect Supadata from the directory; otherwise you end up with two Supadata connections.
On **Team and Enterprise** plans, an Owner first enables Supadata for the organization under [**Organization settings** → **Connectors**](https://claude.ai/admin-settings/connectors). Members then connect with their own Supadata account. On Team plans, members without permission see a **Request** button that notifies the Owners.
If you added Supadata earlier with **Add custom connector** and the URL `https://api.supadata.ai/mcp`, that connection keeps working and shows under **Custom** in Claude's connector settings. To switch to the directory listing, remove the custom connector and connect Supadata from the directory; otherwise you end up with two Supadata connections.
 ### Claude Code
1. Add the Supadata MCP server:
```bash theme={null}
claude mcp add --transport http supadata https://api.supadata.ai/mcp
```
2. Run `/mcp` in Claude Code and select **Authenticate** for Supadata to complete the OAuth flow in your browser.
### ChatGPT
1. Go to **Settings** → **Apps & Connectors**
2. Click **Create** to add a new connector
3. Enter `Supadata` as the name and `https://api.supadata.ai/mcp` as the connector URL
4. Click **Save**
To use it in a conversation, click the **+** icon in the composer, select **More** → **Developer mode**, and choose the Supadata connector.
### Cursor
1. Open Cursor Settings
2. Navigate to **MCPs & Integrations** → **New MCP Server**
3. Add new MCP server:
```json theme={null}
{
"supadata": {
"command": "npx",
"args": ["-y", "@supadata/mcp"],
"env": {
"SUPADATA_API_KEY": "your-api-key"
}
}
}
```
### Windsurf
Add to `~/.codeium/windsurf/mcp_config.json`:
```json theme={null}
{
"mcpServers": {
"supadata": {
"command": "npx",
"args": ["-y", "@supadata/mcp"],
"env": {
"SUPADATA_API_KEY": "your-api-key"
}
}
}
}
```
### VS Code
Add a `.vscode/mcp.json` file to your workspace. VS Code will prompt for your API key the first time the server starts:
```json theme={null}
{
"inputs": [
{
"type": "promptString",
"id": "apiKey",
"description": "Supadata API Key",
"password": true
}
],
"servers": {
"supadata": {
"command": "npx",
"args": ["-y", "@supadata/mcp"],
"env": {
"SUPADATA_API_KEY": "${input:apiKey}"
}
}
}
}
```
## Configuration
### Environment Variables
* `SUPADATA_API_KEY`: Your Supadata API key (required for the local `npx` server; not needed for the hosted OAuth server)
## Support
* [GitHub Issues](https://github.com/supadata-ai/mcp/issues)
* [MCP Documentation](https://github.com/supadata-ai/mcp#readme)
This documentation is built and hosted on [Mintlify](https://mintlify.com), a developer documentation platform.
### Claude Code
1. Add the Supadata MCP server:
```bash theme={null}
claude mcp add --transport http supadata https://api.supadata.ai/mcp
```
2. Run `/mcp` in Claude Code and select **Authenticate** for Supadata to complete the OAuth flow in your browser.
### ChatGPT
1. Go to **Settings** → **Apps & Connectors**
2. Click **Create** to add a new connector
3. Enter `Supadata` as the name and `https://api.supadata.ai/mcp` as the connector URL
4. Click **Save**
To use it in a conversation, click the **+** icon in the composer, select **More** → **Developer mode**, and choose the Supadata connector.
### Cursor
1. Open Cursor Settings
2. Navigate to **MCPs & Integrations** → **New MCP Server**
3. Add new MCP server:
```json theme={null}
{
"supadata": {
"command": "npx",
"args": ["-y", "@supadata/mcp"],
"env": {
"SUPADATA_API_KEY": "your-api-key"
}
}
}
```
### Windsurf
Add to `~/.codeium/windsurf/mcp_config.json`:
```json theme={null}
{
"mcpServers": {
"supadata": {
"command": "npx",
"args": ["-y", "@supadata/mcp"],
"env": {
"SUPADATA_API_KEY": "your-api-key"
}
}
}
}
```
### VS Code
Add a `.vscode/mcp.json` file to your workspace. VS Code will prompt for your API key the first time the server starts:
```json theme={null}
{
"inputs": [
{
"type": "promptString",
"id": "apiKey",
"description": "Supadata API Key",
"password": true
}
],
"servers": {
"supadata": {
"command": "npx",
"args": ["-y", "@supadata/mcp"],
"env": {
"SUPADATA_API_KEY": "${input:apiKey}"
}
}
}
}
```
## Configuration
### Environment Variables
* `SUPADATA_API_KEY`: Your Supadata API key (required for the local `npx` server; not needed for the hosted OAuth server)
## Support
* [GitHub Issues](https://github.com/supadata-ai/mcp/issues)
* [MCP Documentation](https://github.com/supadata-ai/mcp#readme)
This documentation is built and hosted on [Mintlify](https://mintlify.com), a developer documentation platform.